It is possible to track the visits within the ordering menu and measure the conversion rate of your orders based on the menu visits, using the Google Tag Manager integration we provide and connecting it to the Google Analytics platform.
To setup Google Analytics copy the Google Tag Manager install code and paste it in the restaurant’s account Other Tab, 3rd Party Integrations Section, 3rd Party Tracking Field:
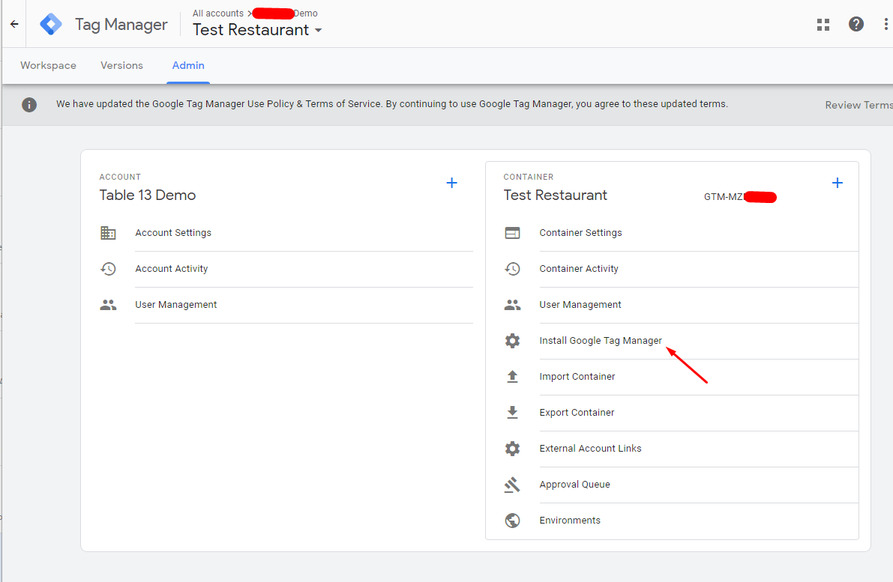
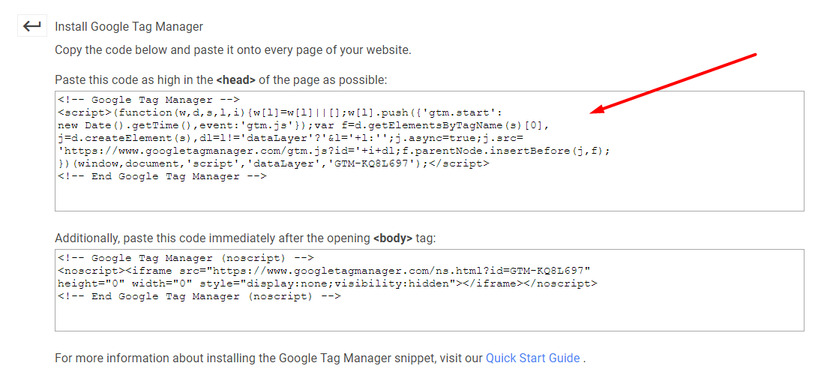
First, access your Google Tag Manager account, Admin tab and go to Install Google Tag Manager section:
Copy the first code (we don’t need the 2nd code)
Paste the code in the restaurant administration page, 3rd Party tracking section and Save, like this:
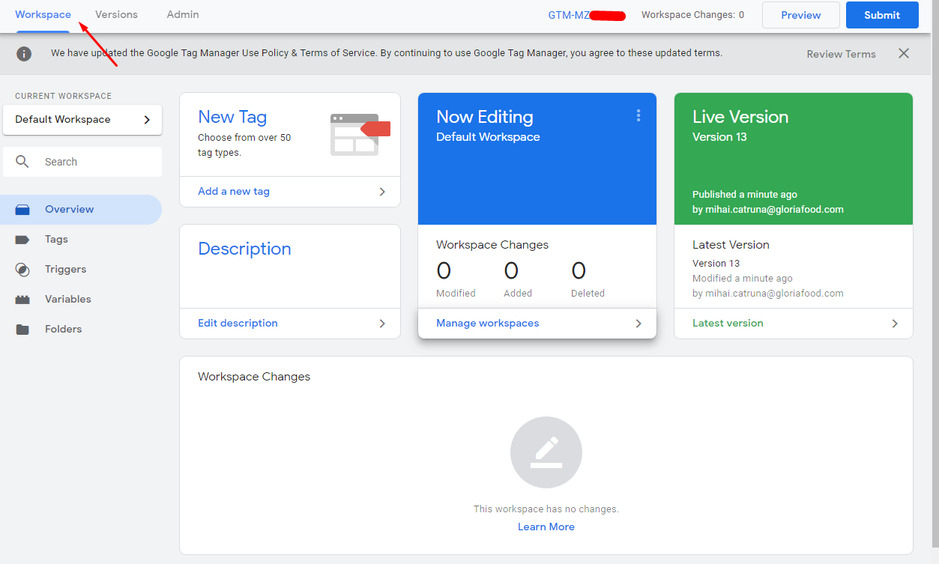
To start the Google Tag Manager configuration, access the Workspace Tab within the Tag Manager account:
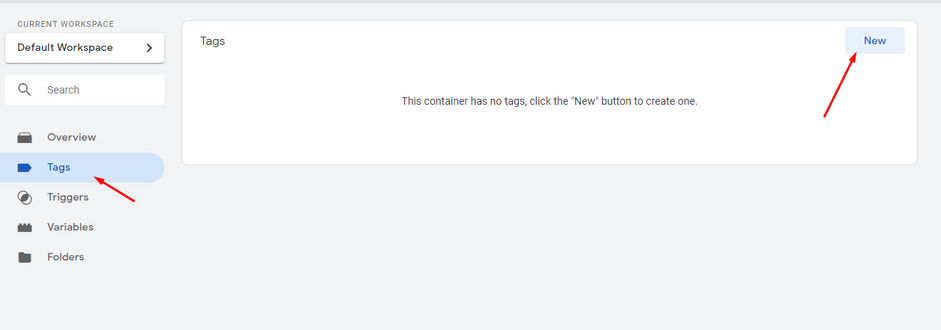
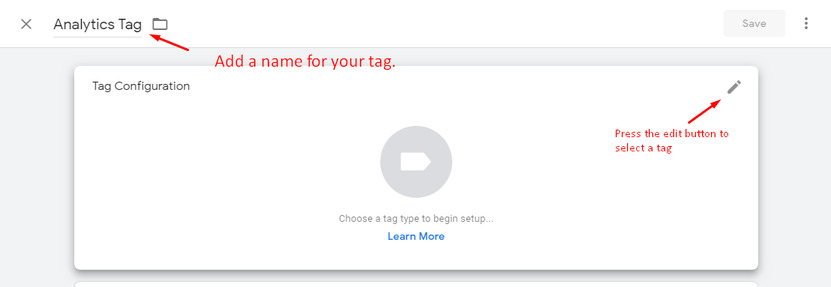
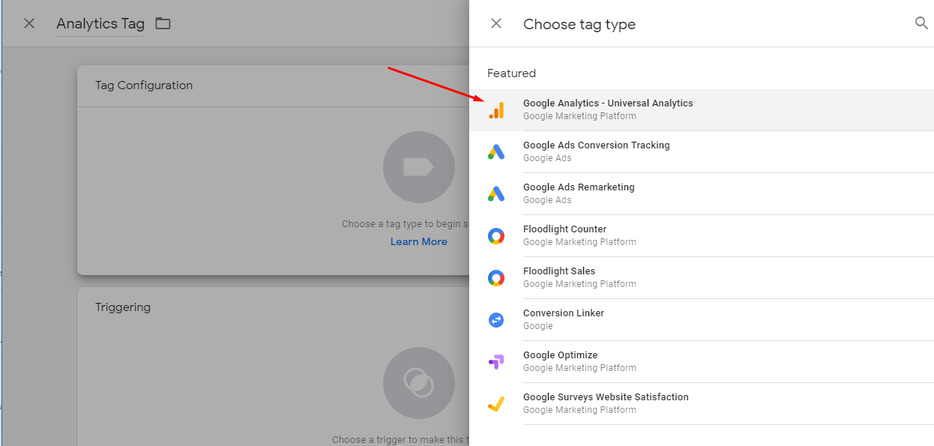
Add the Custom HTML Tag from the Tags Section by pressing on the New button:
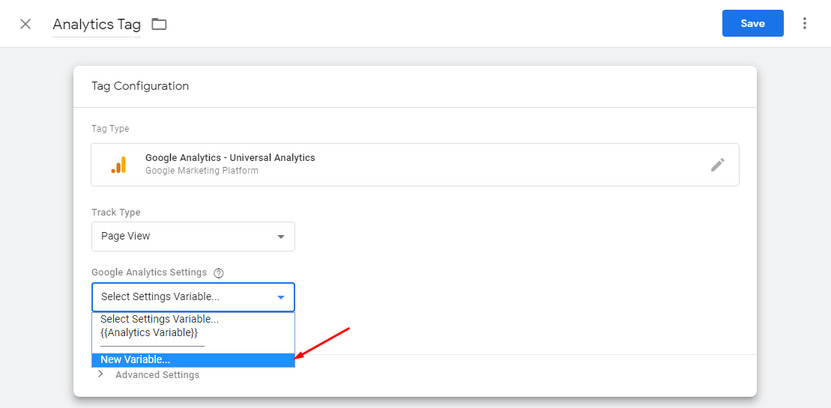
In the Tag Configuration screen, select the New Variable option from the Drop-Down:
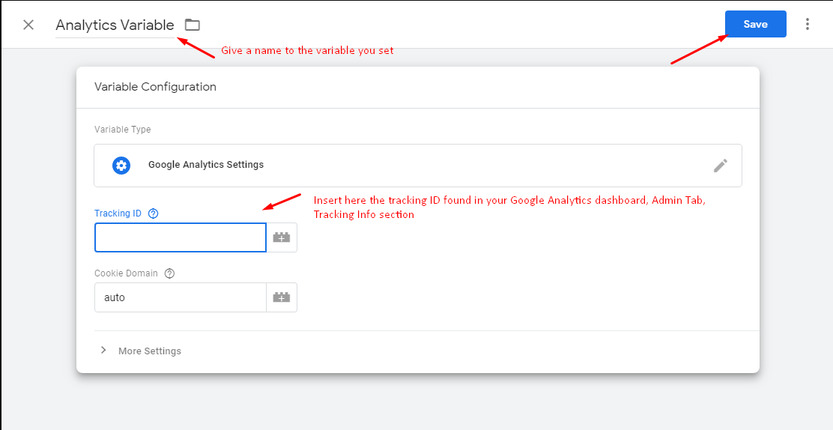
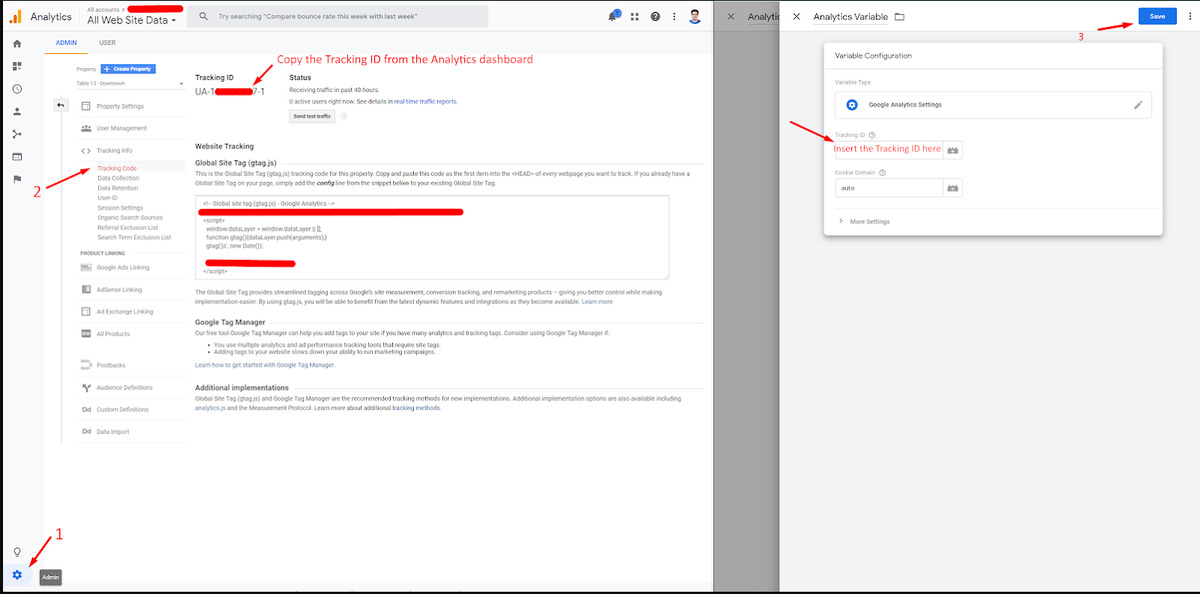
Please be advised that when you configure the Analytics Tag, you need to add the Analytics Tracking ID when you set up the variable configuration.
You can find the tracking ID in your Analytics Account Admin Tab, Tracking Info section:
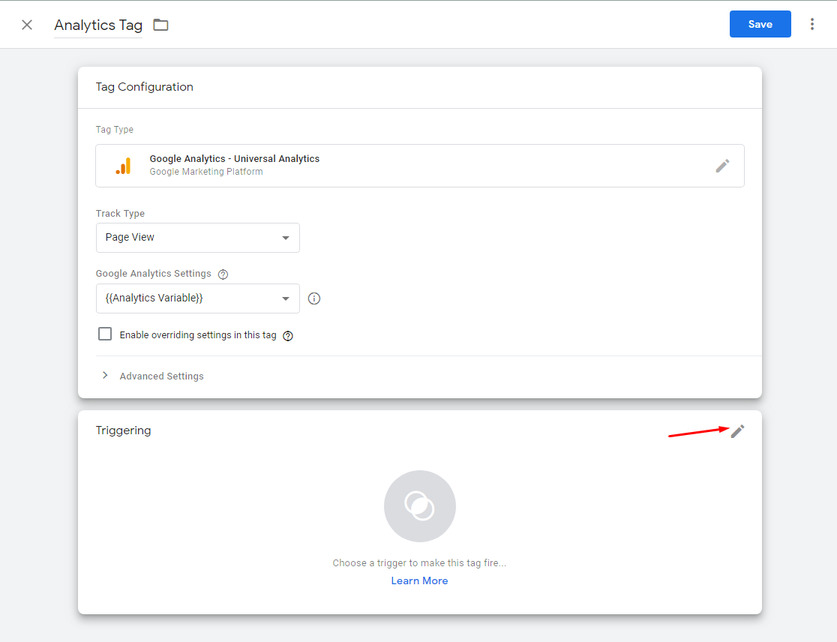
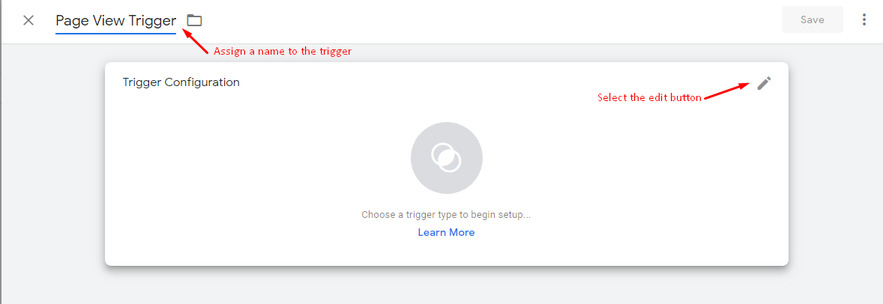
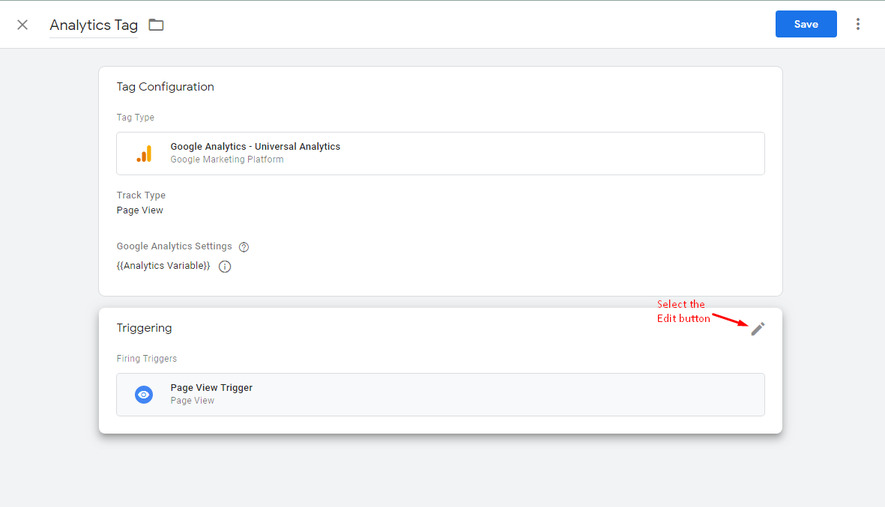
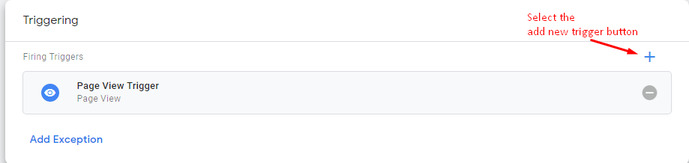
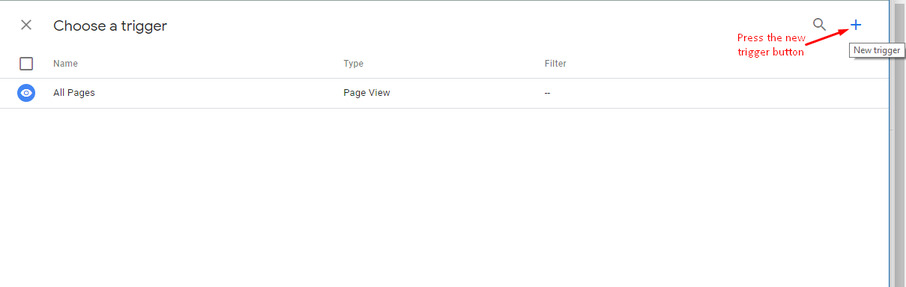
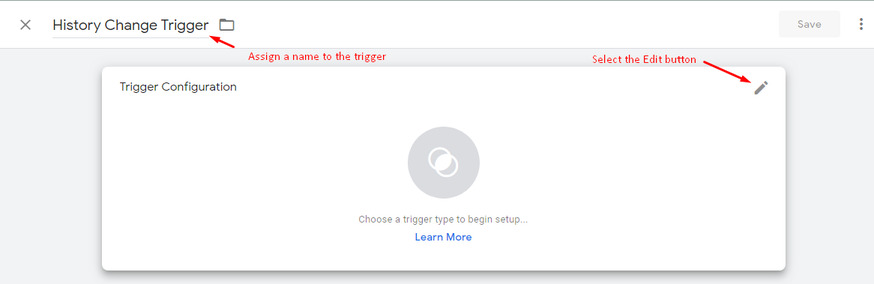
The next step is to configure the two triggers for the Google Analytics tag. You can do this by accessing the Edit button, like this:
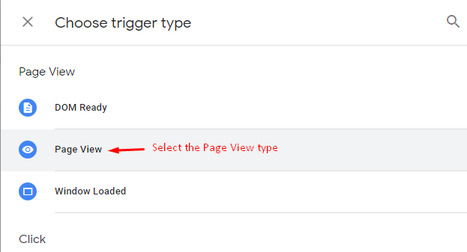
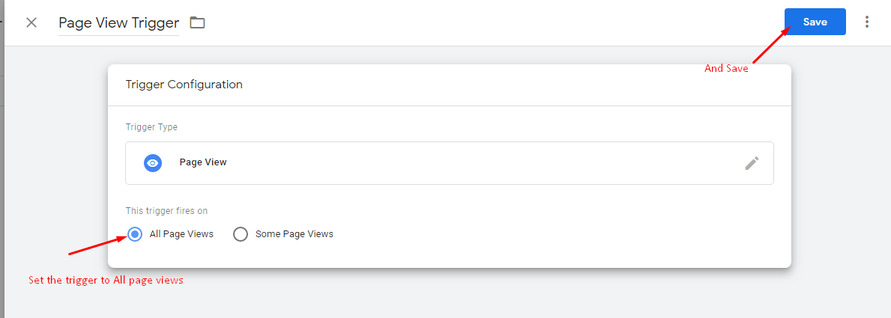
Page View – so you see each page in analytics (whenever there is different URL);
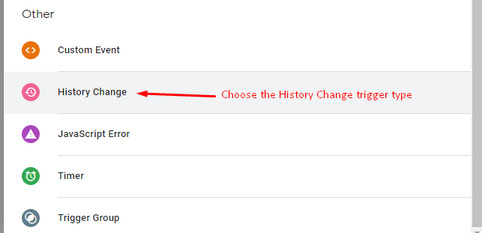
History Change – so you can see each step of the cart in analytics (the widget is a single page app, so there’s one url, which is why this is needed in addition to the Page View trigger).
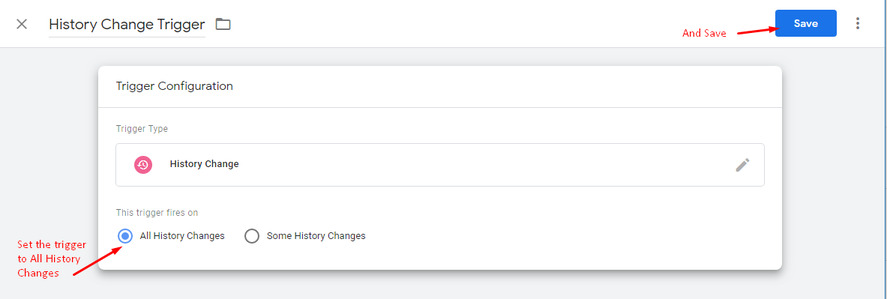
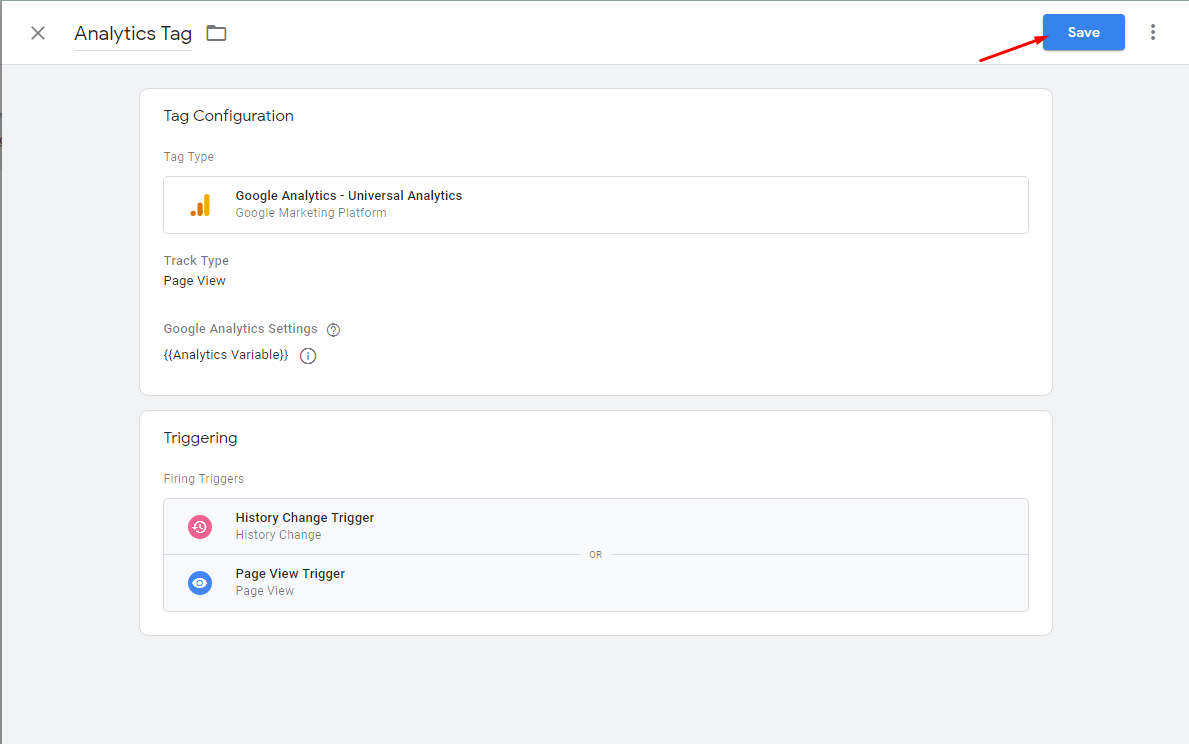
Once both triggers have been configured, press Save in the Tag Configuration page:
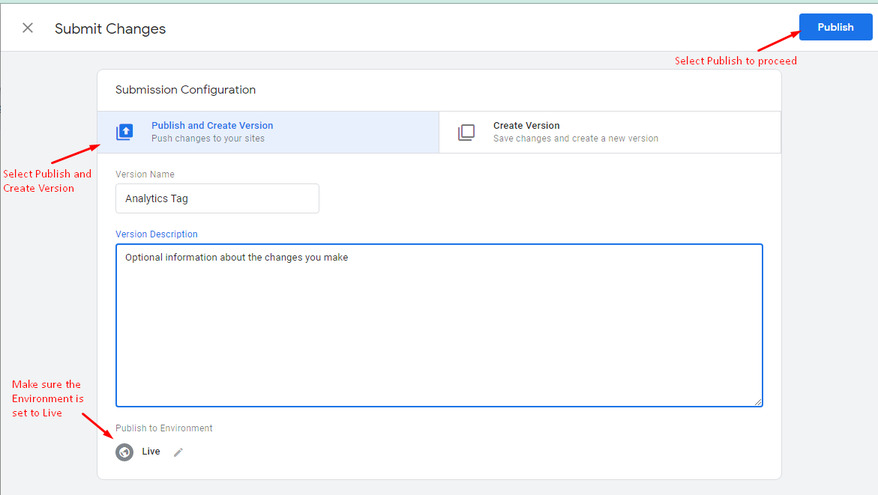
In the Workspace tab, you should see the Tag you configured and the triggers. To submit the changes you made, press the SUBMIT button:
IMPORTANT: If you do not submit the changes, then the integration will not work. Also, if at first you do not see any changes in the workspace tab, then please make sure to refresh the browser page.
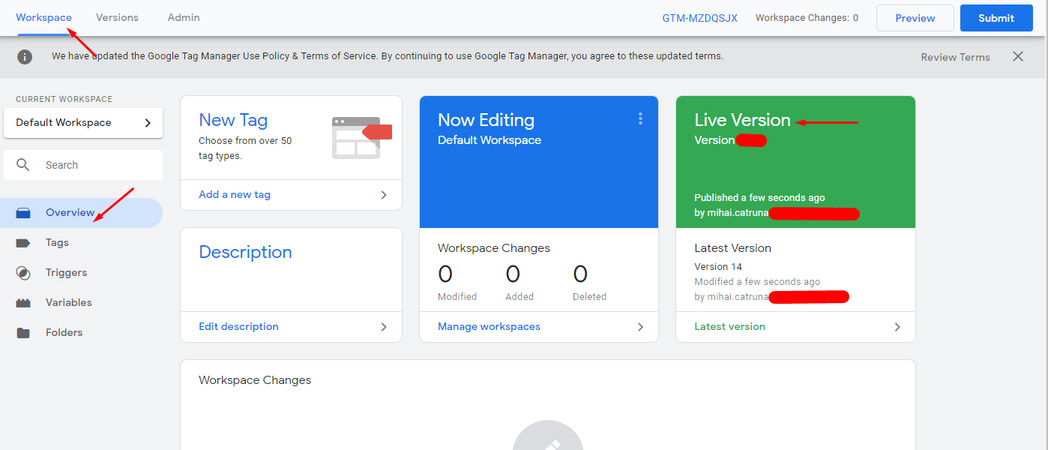
Once the changes are published, when you access the Workspace tab, the message in the green box should be “Live version” followed by the version number of the Tag Manager setup. If you set this up for the first time, the version should be 1.
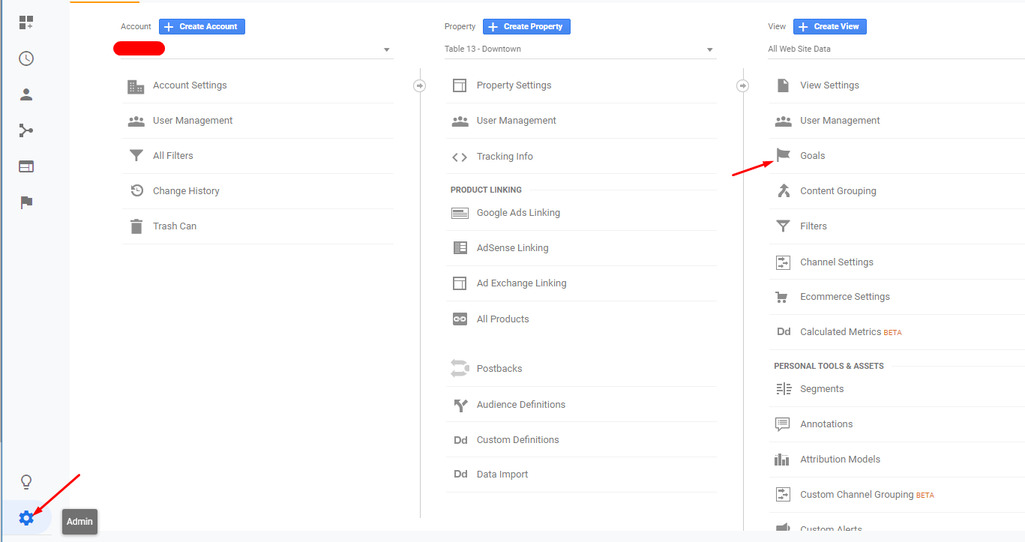
In order to track the conversion of accepted orders you need to first create a Goal in your Analytics Account. To do this, you need to go to the Goals Section of the Admin Tab of your Analytics account, like this:
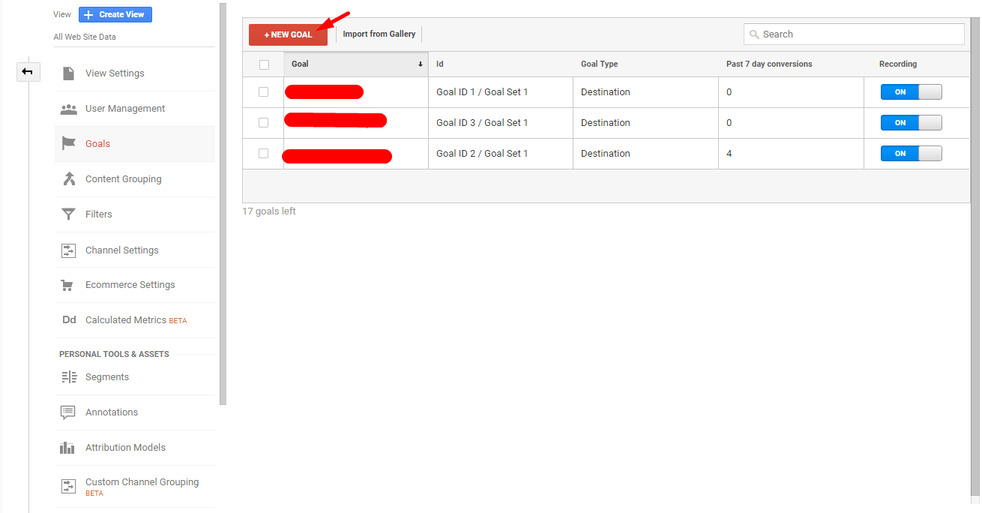
In the Goals section, you can create a new conversion goal by selecting the New Goal button:
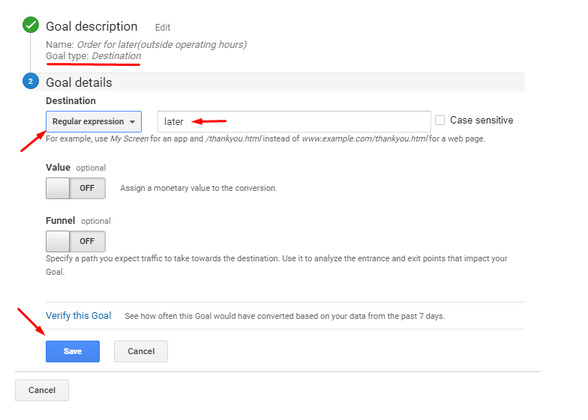
Afterwards, you can create a Goal for accepted orders. Make sure that the Goal type is set to destination and the Destination in the Goal details is set to Regular Expression, like this:
It is good to mention that, if the order was placed outside of the restaurant business hours you may configure a similar goal for the orders for later. Within our system the URL for orders for later is /ordering/restaurant/menu/outcome/later?.
So you simply need to make another goal with the phrase “later” instead of “accepted”, like this:
However, since Analytics tracks the page views, it will not be possible to tell which of the tracked orders, placed outside of restaurant opening hours, have been accepted or not, as the food client by then will no longer be in the respective page.
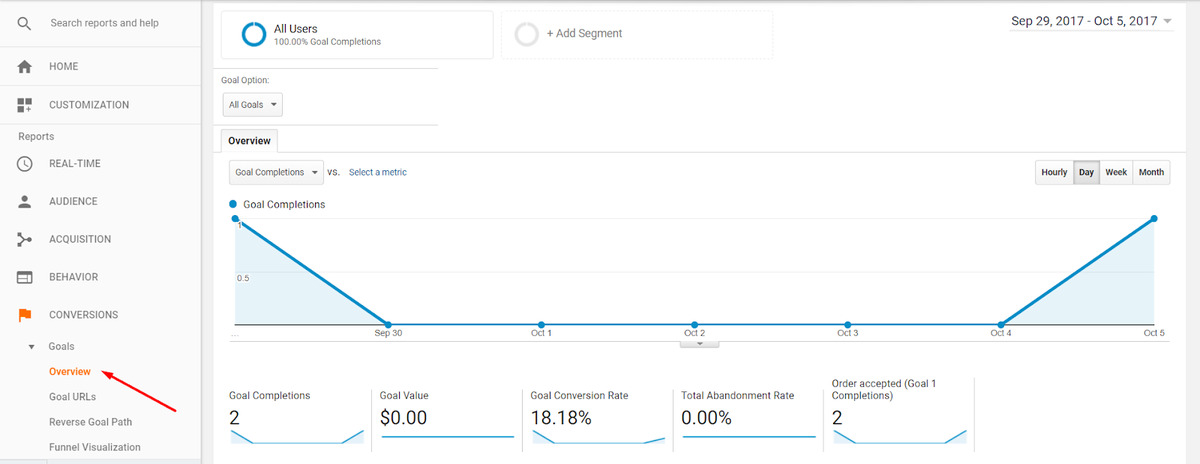
But you will be able to verify the goal completion rate in the Analytics account Conversions Tab, Overview Section:
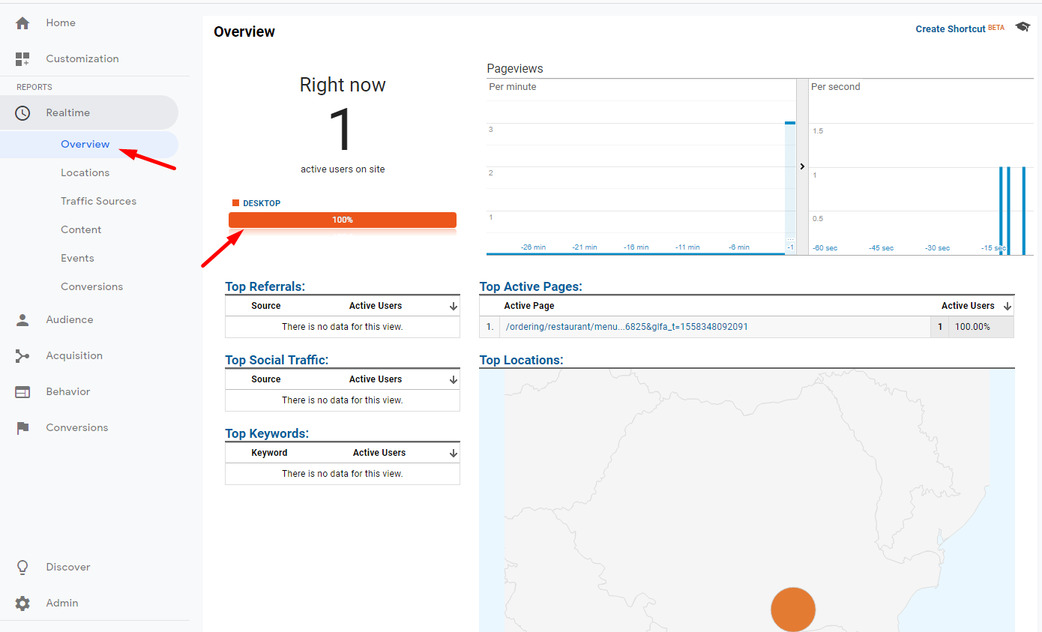
To verify if your Tag Manager integration has been configured properly, you can simply test this by accessing the ordering menu from another tab in the browser or from a browser on your mobile device. Once you have accessed the ordering menu, you should receive data in the Real-time section of your Analytics account:
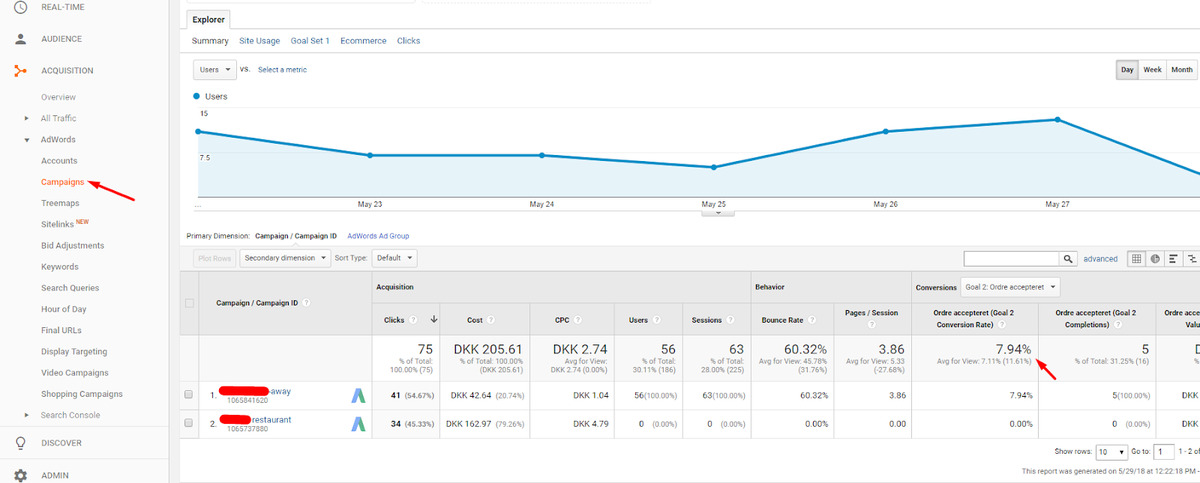
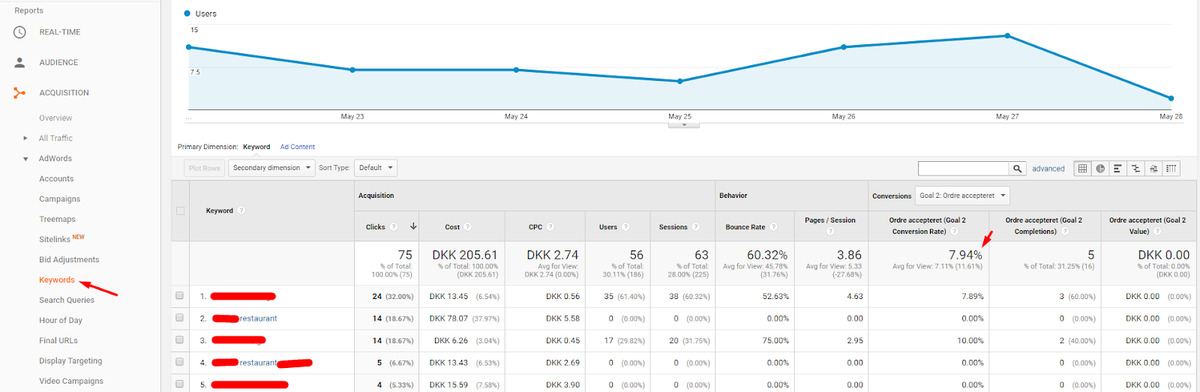
Optional: In the event that you are running Google Ads campaigns
After you set up the order accepted goal you will be able to see the conversion rate of this goal in relation to the adwords you run, like this: