Example of promotion creation – “% discount on cart”
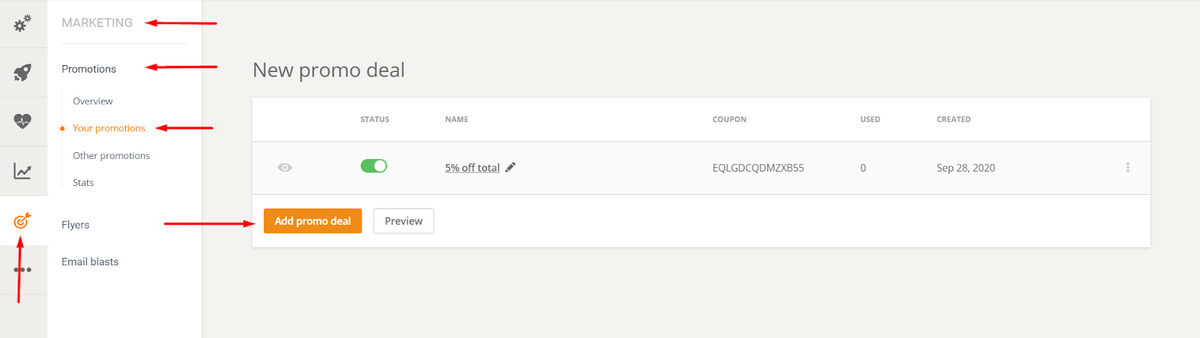
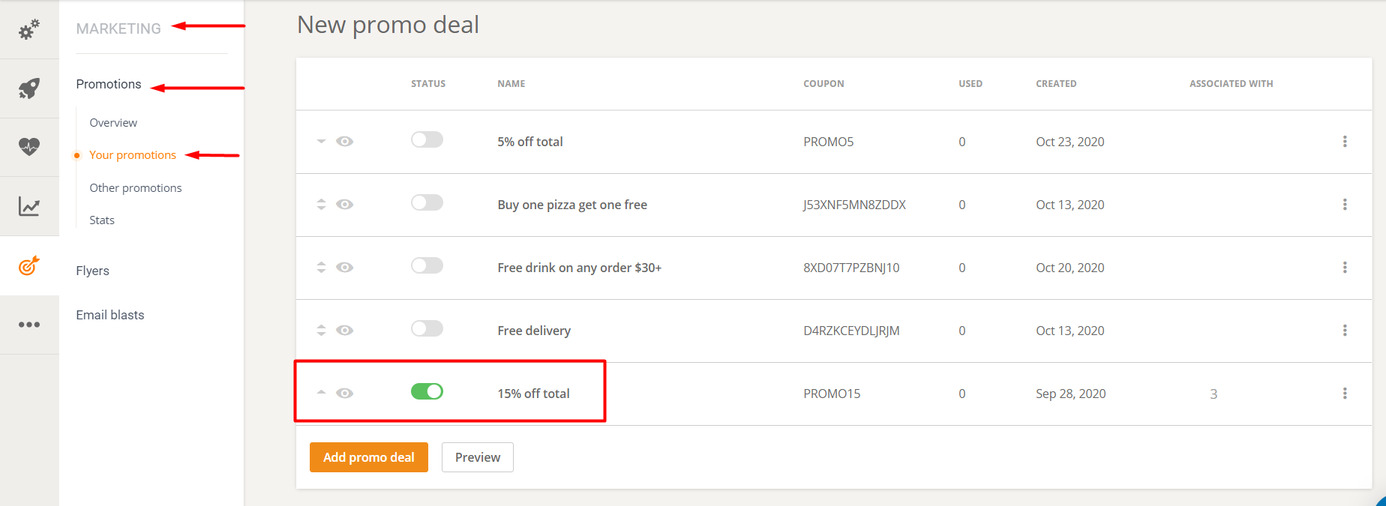
To create a promotion for your restaurant, go to Admin -> Marketing -> Promotions -> Your promotions. Then, click on “Add promo deal” to create a new promotion.
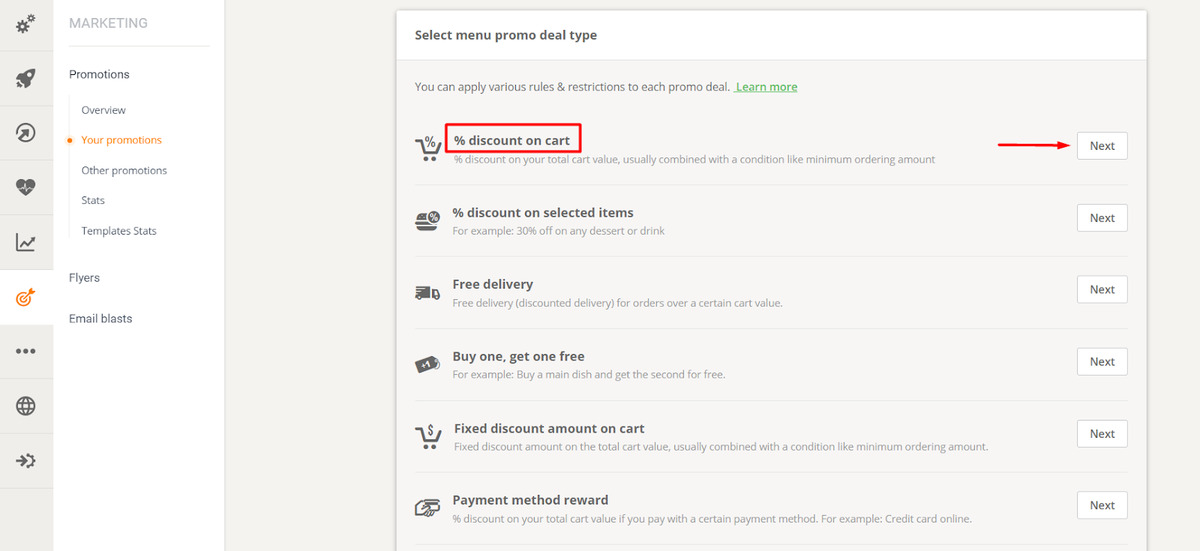
The “Add promo deal” button takes you to a list where you have to choose the type of promotions you want to offer.
Let’s say you want your first promo to be a “% discount on cart”. Click “Next” to start customizing the promotion.
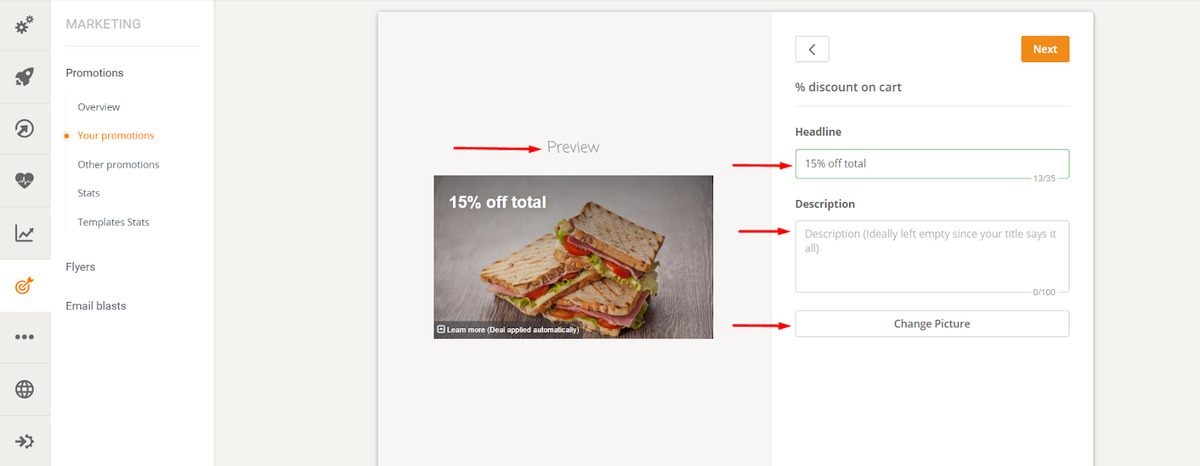
Customize the order visually. The headline should be the % discount you plan to offer. You can also add a more detailed description, but usually, the title is more than enough.
A representative image will also make the promo more attractive. If you click on “Change picture,” you can choose from our extensive library of food photos, but you can also upload your own by clicking on “Your own picture,” then drag and drop it into the respective field.
On the left, you can see how the promo will look to your clients.
Click on “Next” to go to the second step.
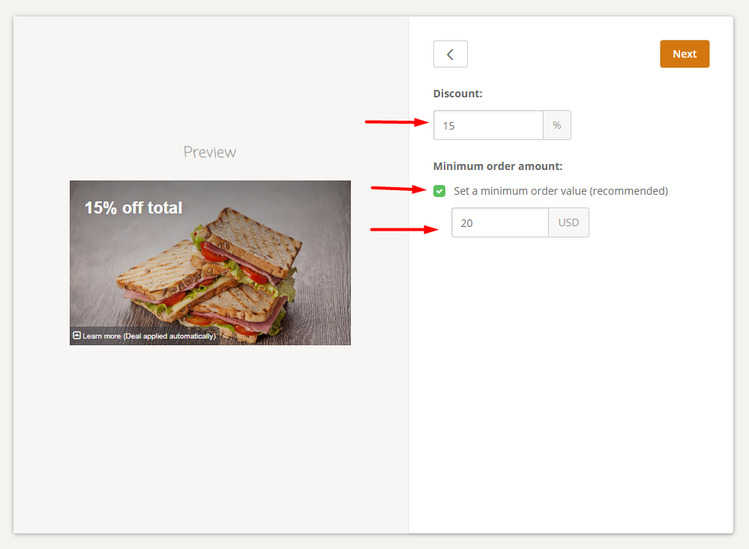
Here you enter the benefits you want to offer. In case of a “% discount on cart”, you select the exact % of the discount. Preferably, also set a minimum order value to ensure you still make a profit.
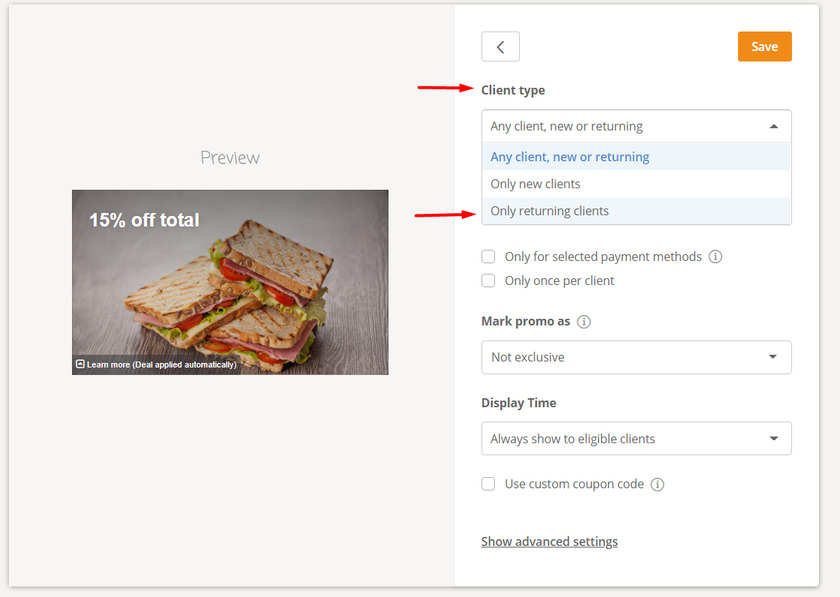
This is where you define your target audience.
First, decide who you want to benefit from this promotion: all clients, just returning clients or just new clients.
Choosing new clients is a great way to draw them in if they haven’t ordered from you before by offering a discount on first buy for first-time customers.
If you want the promotion to only be available to people who pay, let’s say, by credit card, check the “Only for selected payment methods” box. Then, check whichever option you have set that includes card payments (example: “Card to delivery person or at pickup counter.”)
Remember that to do that, you have to enable payment by card. You can do that in Setup -> Payments -> Online Payments.
If you want customers to only benefit from the promotion once, check the “Only once per client” box.
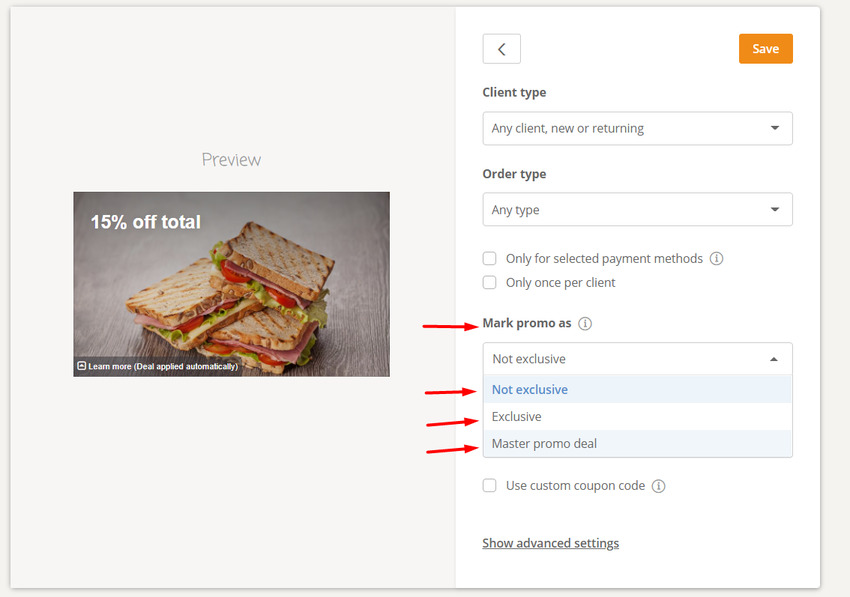
You have 3 options of how you can mark this promo:
Not exclusive, which means the customer can use this and another promotion in the same order.
Exclusive, where the customer can’t add other promos on the same item when they use this one.
Master promo deal, which means the customer can redeem this promo together with other promos, even with promos that are marked as “exclusive.”
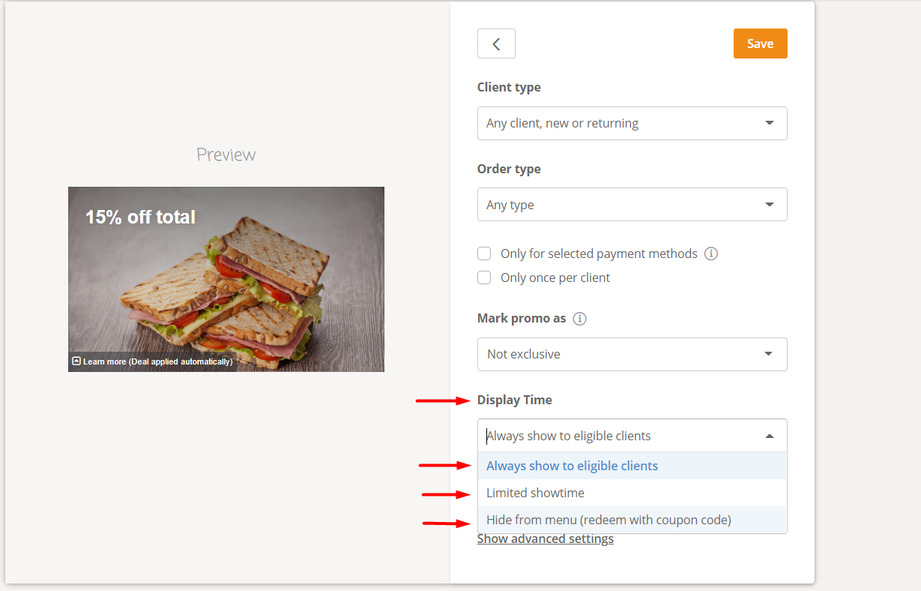
You can also choose when to display the promo:
Always (to people who are eligible);
Limited, where you select the days and time of the week you want to promo to be displayed, as well as the larger period when you want it to be available (weeks, months);
Hidden and only redeemable with a coupon code. If you choose this option, we recommend checking the box below marked “use custom coupon code.” This is usually used when you distribute flyers that have a coupon code on them. If you hide the promo, only people who know the code will be able to redeem it.
Once you’ve settled on all these details, click “Save” to save your changes and then activate the promotion from Admin->Marketing->Your promotions – enable (see below).